写到这里,我们已经大致完成了游戏过程的逻辑。现在,我们需要实现游戏的菜单以及按钮,然后再把开始游戏的流程串联起来。
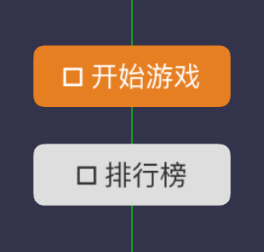
菜单 首先我们新建一个菜单类Menu,实质上是实现一个放置按钮的容器THREE.Group,最后再统一添加到topScene(顶层舞台):
1 2 3 4 5 6 7 8 9 10 11 12 13 14 15 16 17 18 19 20 21 22 23 24 25 26 27 class Menu { constructor ( this .mesh = this .render (); } private render ( const group = new THREE .Group (); const startButton = new Button (); const rankButton = new Button (); group.add (startButton.mesh ); group.add (rankButton.mesh ); return group; } } ... public showMenu ( this .menu = new Menu ({ game : this , }); this .topScene .add (this .menu .mesh ); }
按钮 自定义按钮图形 Three.js 没有封装按钮的类,需要我们自行实现。我们需要实现的是带有圆角的矩形按钮,所以PlaneGeometry显然已经不能满足需求了,但我们可以用Shape画出圆角矩形。首先我们新增一个 Button 类,宽高分别为width和height,圆角为radius,位置坐标为x,y,首先自定义一个圆角矩形:
1 2 3 4 5 6 7 8 9 10 11 12 13 14 15 16 17 ... private getShape ( const x = - width / 2 ; const y = - height / 2 ; const roundedRectShape = new THREE .Shape (); roundedRectShape.moveTo (x, y + radius); roundedRectShape.lineTo (x, y + height - radius); roundedRectShape.quadraticCurveTo (x, y + height, x + radius, y + height); roundedRectShape.lineTo (x + width - radius, y + height); roundedRectShape.quadraticCurveTo (x + width, y + height, x + width, y + height - radius); roundedRectShape.lineTo (x + width, y + radius); roundedRectShape.quadraticCurveTo (x + width, y, x + width - radius, y); roundedRectShape.lineTo (x + radius, y); roundedRectShape.quadraticCurveTo (x, y, x, y + radius); return roundedRectShape; }
然后用画出来的图形,生成 ShapeGeometry,注意自定义 Shape 是没有 uv 坐标的,需要我们自己手动添加,否则贴图将不能正常显示 ,assignUVs该模块抽取出来在threejs-shim实现:
1
2
3
4
5
6
7
8
9
10
11
12
13
14
15
class Button { constructor ( this .mesh = this .render (); } ... private render ( const material = new THREE .MeshBasicMaterial (); const shapeGeometry = new THREE .ShapeGeometry (shape); shapeGeometry.assignUVs (); const mesh = new THREE .Mesh (shapeGeometry, material); return mesh; } ... }
按钮贴图 此时的按钮还是只是一个图形而已,我们还需要给按钮加上文本或图标,这里可以用设计好的图片,也可以用 canvas 自己画一个(出于维护的方便,我选择用一个开源库cax 画按钮),然后转化成纹理贴图,最后贴到按钮网格上就 OK 了。但需要注意的是,我们的 canvas 需要自己适配高清屏,适配参考网上资料即可,这里不再做赘述。
还有注意开发者调试工具暂不支持加载字体,所以 iconfont 会显示乱码,需要做好环境兼容,另外图标的 unicode 码需要加上\u:
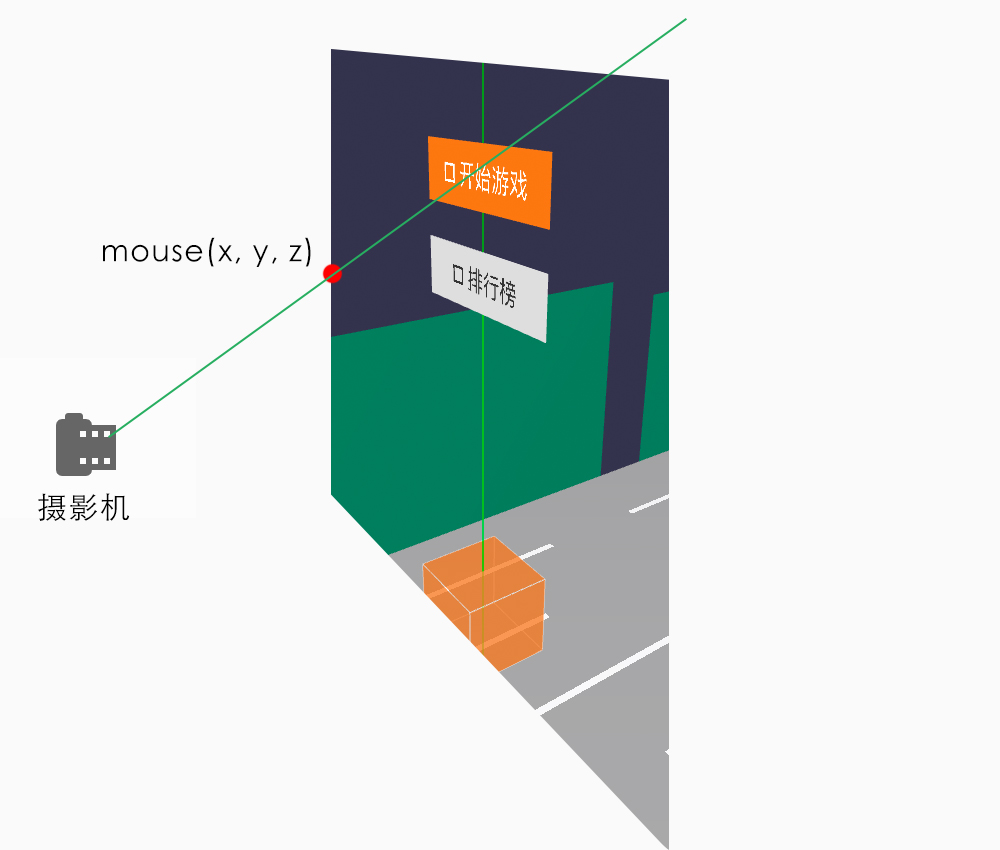
按钮事件 我们再给按钮新建一个 TAP 事件,虽然 Three.js 没有帮我为平面网格提供绑定事件,但是内置的Raycaster类却为按钮事件提供更为简便的实现方式,Raycaster 是光射线的意思,如果起点是 Camera,然后再确定一个点 mouse(x, y, z),就可以画出一条射线了,那么射线穿过的地方,就可以被拾取到了。
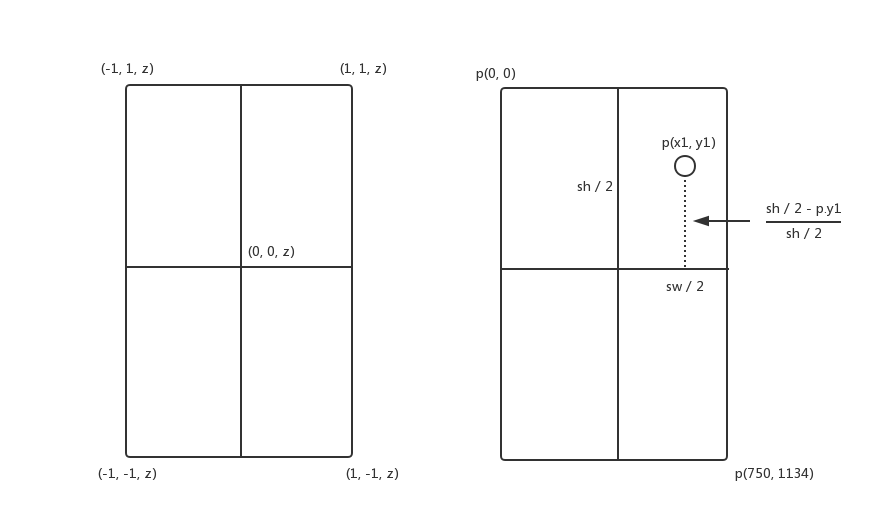
mouse(x, y, z)是遵循 webGL 坐标系,取值范围为-1,1,那么如果我点击屏幕的二维坐标是p(x1, y1),屏幕宽度分别为sw与sh,要如何确定 mouse 这个点,且看下图:
sh / 2 - p.y1为虚线的高度,再除于sw / 2就是标准后的 WebGL 坐标系的 y 坐标,同理 x 坐标 = (sh / 2 - p.x1) / (sh / 2)。最后我们给按钮注册一个订阅Tap事件,获取到点击坐标后,再标准化该坐标,然后用 Raycaster 射线检测该点击是否穿过指定的网格,就可以如果穿过,我们再执行回调函数callback:
1 2 3 4 5 6 7 8 9 10 11 12 13 14 15 16 17 ... private addTapEvent ( if (this .callback ) { this .tapEvent = this .game .emitter .addListener (EVENTS .TAP , ({ position } ) => { const raycaster = new THREE .Raycaster (); const x = 1 - (position.x / (SCREEN_WIDTH / 2 )); const y = 1 - (position.y / (SCREEN_HEIGHT / 2 )); const mouse = new THREE .Vector2 (x, y); raycaster.setFromCamera (mouse, this .game .camera ); const intersect = raycaster.intersectObject (this .mesh ); if (intersect.length ) { this .callback (); } }); } }
开始游戏 给开始游戏 按钮注册了Tap事件后,我们就可以控制游戏的开始了,首先给Game类新增一个 start 的方法:
1
2
3
4
5
... public start ( this .isPlaying = true ; this .playAudio (); }
然后在Menu类渲染按钮时,注册 callback 函数,并函数内执行该 start 方法。
总结 除了渲染游戏按钮和注册按钮事件外,还做了:
preload模块加载字体文件。新增开场音乐,玩家点击开始游戏后,再切换到游戏音乐。
详细的项目结构如下:
1
2
3
4
5
6
7
8
9
10
11
12
13
14
15
16
17
18
19
20
21
22
23
24
25
26
27
28
29
30
31
32
33
34
35
36
37
38
39
40
41
42
43
44
./src ├── Game │ ├── Button // 游戏按钮 │ │ └── index.ts │ ├── Menu // 游戏菜单 │ │ └── index.ts │ ├── Gamepad // 游戏手柄 │ │ └── index.ts │ ├── NPC // NPC角色 │ │ ├── box.ts // 正方形 │ │ ├── cone.ts // 锥形 │ │ └── index.ts │ ├── Player // 游戏主角 │ │ └── index.ts │ ├── Pool // 对象池 │ │ └── index.ts │ ├── Racetrack // 跑道 │ │ └── index.ts │ ├── Score // 分数 │ │ └── index.ts │ ├── MusicFrame // 音乐动画帧 │ │ └── index.ts │ ├── camera // 摄影机 │ │ └── index.ts │ ├── constant.ts // 常量 │ ├── helper │ │ ├── axes.ts // 辅助坐标系 │ │ └── orbitControls.ts // 摄影机轨道控制器 │ ├── index.ts │ ├── renderer // WebGL渲染器 │ │ └── index.ts │ ├── scene // 场景 │ │ └── index.ts │ └── util // 工具 │ └── index.ts └── preload │ ├── index.ts 资源加载 ├── index.ts // 入口 └── lib ├── weapp-adapter-extend // weapp-adapter的扩展,新增window的方法 │ ├── index.js │ └── window.js └── weapp-adapter.js // 模拟BOM,DOM └── threejs-shim.js // treejs的垫片
代码::https://github.com/inarol/rungame/tree/section6
[本文谢绝转载,谢谢]